How To Make a School Supply Cake
Yes, I actually made this. Nope, it wasn’t hard.
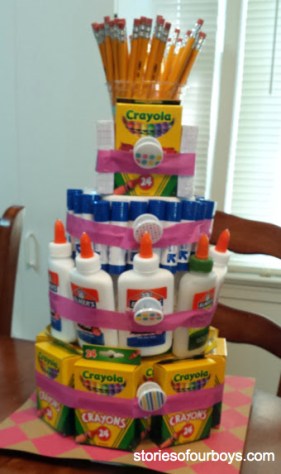
Today I am going to tell you the entire step by step process for how to make a school supply cake like this one.
If I can do it, anyone can. I’m always saying I’m not a crafty person, but then I do have so much fun putting stuff like this together. I’m beginning to wonder if I actually DO enjoy crafts after all….
Next week is Staff Appreciation Week at the boys’ school, and I am “room mom” for Caleb’s class.
Don’t be impressed. I am never ‘room mom.’ This is simply what happens when you are the last parent to leave Open House, and you realize that no one signed up for that position. Thankfully, the position really hasn’t required that much of my time. I’m not able to volunteer during school hours, as I have two babies at home, but I can organize class events from right here at home.
Now, let’s talk about how to make this ‘supply cake.’
That term sounds goofy to me, so let’s call it a tower here. I found this idea on my favorite idea zone, Pinterest! I found several towers like this, read about them, and none of them were exactly what I wanted, but this particular one served as my inspiration because it is just so darn cute.
Shout out to whatsscrapping.blogspot.com for the inspiration on this!!
I wasn’t able to come up with exactly the same supplies that were used here, so I decided to just ‘wing it’ a bit.
Like it?? You can totally make this. I’m including directions here for exactly how I made this, to make it as easy as possible for you!!
To print the directions: click here (Page 1 comes last on the printable. But don’t worry. It is there.)

First, buy this:
scrapbook paper
paper plate
a pretty color masking tape to match the scrapbook paper
16 boxes 24 count crayon boxes
10 bottles Elmer’s glue
26 glue sticks
1 paper towel roll
1 full size Dixie cup
2 boxes 24 count #2 pencils
2 packs of 100 count index cards
5 rubber bands
4 jumbo paper clips
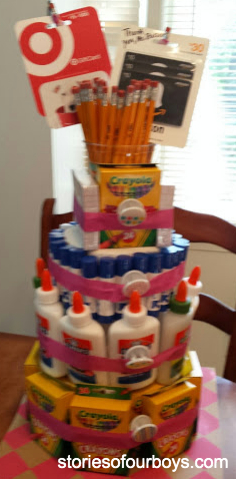
alternative: You can also use packs of glue sticks instead of glue sticks, and that’s a little cheaper and easier. If you do the packs of glue sticks, you will need 7 packs of glue sticks. Each pack has two glue sticks.
Here’s a photo of what the glue stick pack version looks like. I made this one for Joshua’s teacher. Families from the class chipped in and paid for these. I just put them together. : )
Directions:
1. Take a sturdy paper plate, turn it upside down, and tape the scrapbook paper to the plate.
2. Don’t stick the paper towel roll to the plate until you have secured layer 1 to the paper towel roll. Trust me. It’s easier to do layer one if it’s not stuck down to the plate yet.
Layer 1:
3. Line 6 boxes of 24 count Crayola crayons around the paper towel roll. Secure with a rubber band.
4. Line 8 boxes of 24 count Crayola crayons around the other boxes of crayons. Secure with a rubber band. Wrap the masking tape around the rubber band. You could also use ribbon. In the middle, clamp on a jumbo paper clip.
5. Now put tape all over the bottom of the paper towel roll and stick it to the prepped paper plate with scrapbook paper.
Layer 2:
6. Take 9 or 10 bottles of Elmer’s glue to form a ring around the paper towels, sitting on top of the inner ring of crayon boxes. Secure with a rubber band. Wrap the tape around the rubber band. Fasten in the center with a jumbo paper clip.
Layer 3:
7. This is the trickiest part, though none of it was hard. The glue doesn’t make a shelf, so you have to tape the glue sticks to the paper towel roll. I just lined up multiple little bundles of masking tape, and stuck the glue sticks to it.
Once all the glue sticks are on, secure layer 3 with a rubber band, cover with the masking tape, and clip on your jumbo paper clip.
Topper:
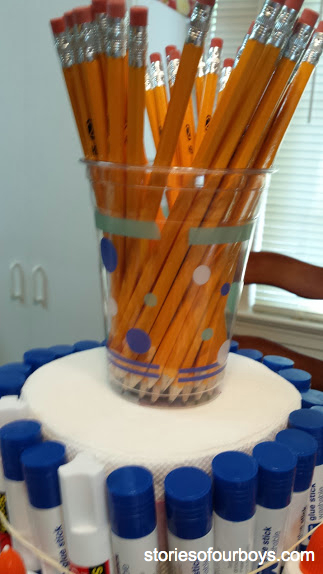
8. I folded some more tape onto the top of the roll, covering most of the hole. Then I pushed the cup onto the top.
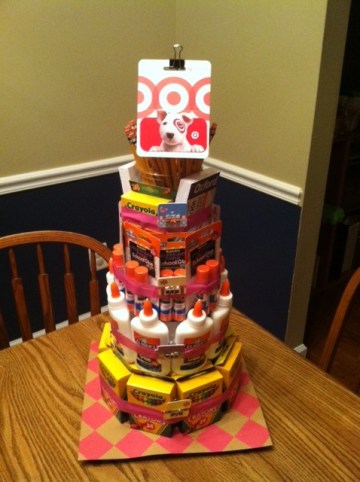
9. I put a crayon box on the north and south sides and index card packs on the east and west. Our class also chipped in for some gift cards, so I stuck those in there too. This would also be great as a Christmas or end of the year gift for your teacher. It was surprisingly easy to make!
Feeling extra crafty?
Visit my article here for inspiration on how to create your own vision board.


Pingback: How to Create a Vision Board, with Examples - Stories of Our Boys
Congratulations on being #1 on Google search for “how to make a school supply cake”. Very few can claim the accomplishment of being first on any Google search.
Is it only my computer or anyone else has tthe
issues wit viewing this wesbsite in firefox?
Pingback: Thoughtful Teacher Gifts - SampleHouse Online
So cute and clever!
Thanks!
Super cute! And you are my hero for being room mom!!:)
Ha! Thanks!
I am really impressed! That is SO cute! Any teacher would be thrilled with a gift like that! Wish I had gotten one like that when I was teaching.
Ha! Thanks! I’m glad you like it!
That is the cutest thing ever!